Nico’s Pizza Dough (70% Hydration / Cold Ferment) (Thermomix & Conventional Methods)
Perfect for portable gas or wood fired pizza ovens such as the Roccboxx, Ovana, Dome or Ooni!
Recipe Updated: September 24th 2022

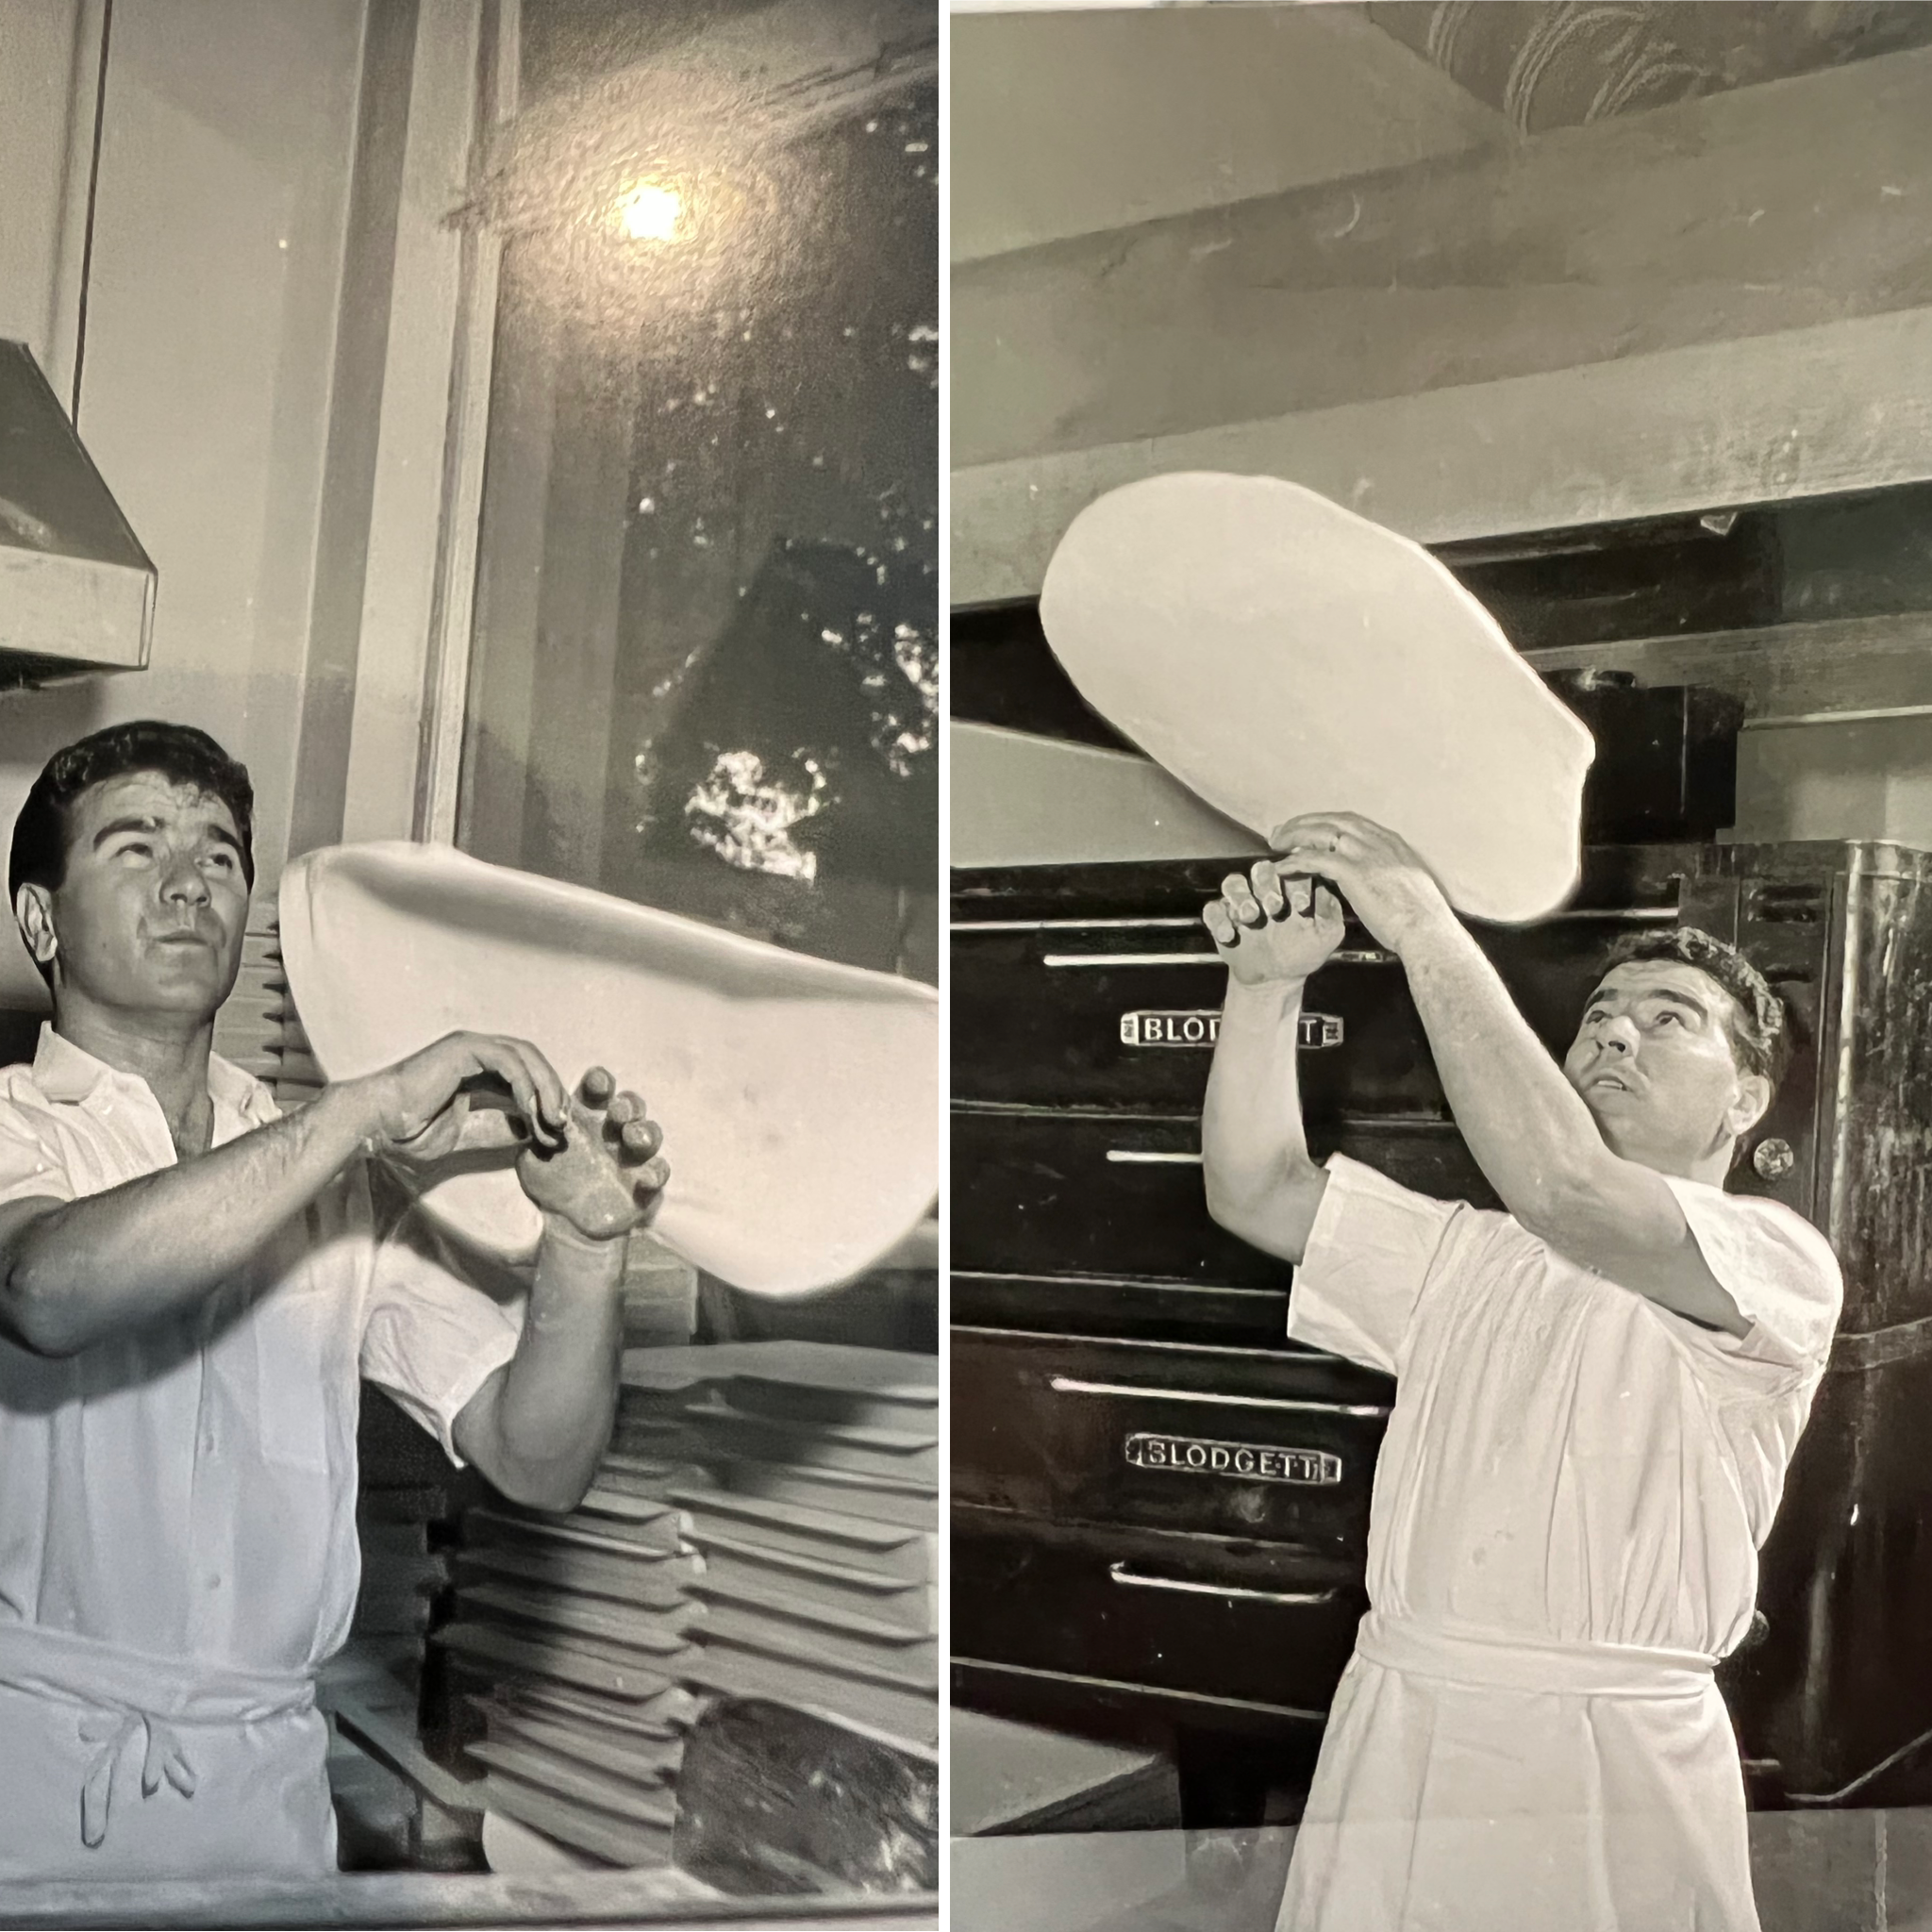
Vito’s Cave (c.1970s)
I was born with the travel bug.
It’s not exactly surprising considering my parents, Vito and Stella, left a small village in Puglia, Italy, in the 1950s, to forge a new life in London, Ontario in Canada.
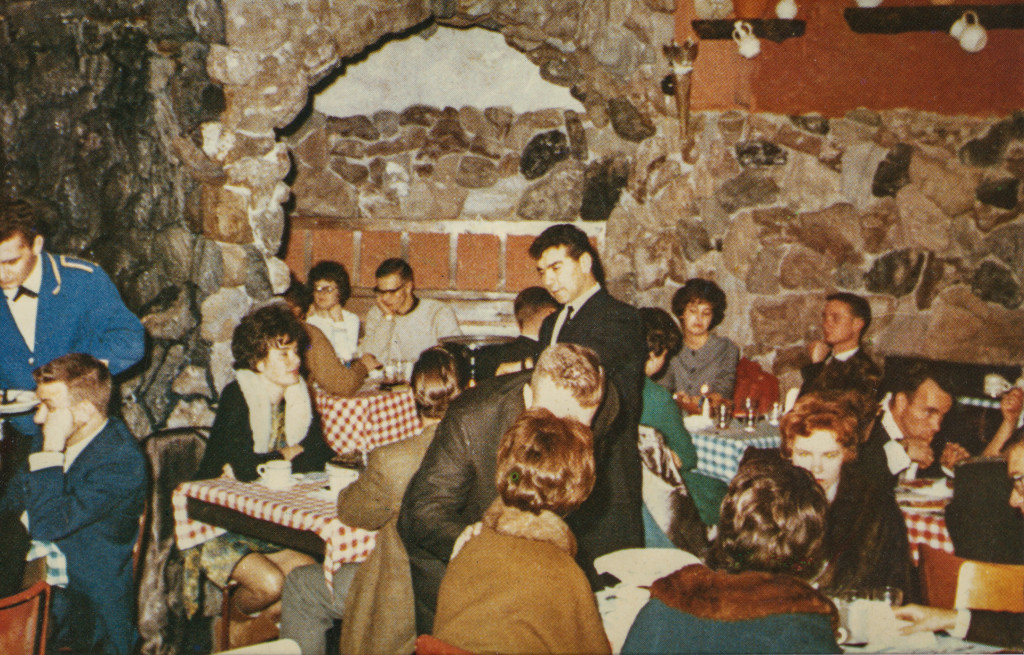
I grew up amongst that indelible migrant spirit. My parents believed that with hope, dreams, hard work and determination, anything was possible. They opened the first Italian restaurant in our town, where they shared their stories, their friendship and introduced their authentic pizza* and cucina povera cuisine with curious locals. It was my dad’s dream to not only deliver Italian food to his new Canadian home, but to also transport people back to a famous seaside cave restaurant in Puglia that dated back to the 17th century, which was a short drive from his village. That’s why he built this grotto restaurant for his patrons and friends to enjoy his food in.
Before long, there were lines down the street for those wanting to dine at Vito’s Cave. Canadians couldn’t get enough of mum and dad’s super simple, authentic Italian food – the EVOO, the fresh handmade pastas and lasagna, the slow cooked meat sauces and other Italian classics, while dining by candlelight in Dad’s cave.
– Introduction excerpt from “Wanderlust – The Cookbook” – by Nico Moretti
* In the early days, clients could watch my dad toss rounds of dough into the air from a front window of the restaurant before creating his pizzas. He literally had to give clients tastings of pizza, as although they may have heard about or seen them in the movies, many had never actually tasted it!
From the excerpt above from my latest cookbook called “Wanderlust”, you could say that I pretty much grew up in a cave! A “pizza cave”!
So, as making pizza is pretty much in my DNA, here are some tips on how to I prepare my “High Hydration Pizza Dough” that is perfect for portable pizza ovens!
The recent rise in popularity of portable gas-fired pizza ovens has been especially welcomed by this “pizza-boy”!
I got my Roccboxx about 3 years ago and my Ovana about 6 months ago, and have been loving the ability to create restaurant quality pizza-oven pizza at home!
There’s something to be said about being able to achieve that classic light and fluffy Neapolitan-style pizza crust…crispy on the outside, bubbled-up & deliciously chewy on the inside…and cooked up before your eyes in just a couple of minutes!
For those of you just starting out with your portable pizza oven and finding it difficult to get them cooked without burning the crust, then I’m here to help with my recipe for a “High Hydration/Cold Fermented Pizza Dough”.
With a “higher hydration” pizza dough, not only will you achieve a more light and fluffy pizza crust with the classic Italian “leopard-spotted” outer edge, but I find that there is less chance of burning your pizza edge as the extra moisture in the dough is more forgiving than the standard pizza dough recipes which are no match for the the extra hot (350-400C) temperatures that a portable pizza oven can reach.
The “cold ferment” is also important as it allows for better flavour, texture & colour of the crust as the slower the fermentation allows for more air to be trapped within the dough for a quick airy “puff” of the crust that browns beautifully when it hits the heat of the pizza oven!
Hi Nico you asked for feedback about the pizza dough recipe you have sent me.
Here it is: This was the best pizza dough I’ve ever made!! My job is to develop better baking products using enzyme technology for large plant bakeries. This is why I’m here in the Netherlands. I used to work for George Weston Foods in Sydney but our mother company moved me to our Global research and development unit here in the Netherlands almost 4.5 years ago. My speciality is plant bakery bread.
Pizza making is my hobby and for my 50th bday I recently got an Ooni pizza oven to make wood fired pizzas. I’m also a diabetic and pizza was always an issue for me. I love it so much but can normally only eat a slice or two before my blood sugar goes through the roof even though I take medication. Well tonight the pizza crust was so crispy and light and tender inside . I ate a whole pizza (260 g dough weight) and my blood sugar stayed in normal levels!!! Meaning that most of the carbohydrates has been converted during the fermentation process.
I only did the 24 hour method. I’ll do the 3 day method later this week. I’m so happy that I found a recipe that doesn’t go havoc with my blood sugar! Defs a “ healthier”pizza for me. Thanks again for sharing this. It really changed my life in the way I can enjoy pizza!! I used to make a 24 hour fermented dough but didn’t add the flour back in so my pizza dough was very soft and difficult to pick up so I used to bake it on baking paper in my Aussie gas bbq but paper doesn’t work in my new wood fired pizza oven so I was on the hunt to what to do to make a better pizza dough for my oven. Thanks so much. I’m so grateful for this recipe to be able to enjoy pizza more! All of the best ! Kind regards from the Netherlands from a fellow Aussie! Lizel
Nico’s Pizza Dough (70% Hydration Dough / Cold Ferment)
(Makes 5 x 25cm pizza bases)
600g Bakers flour or Tipo 00 flour
7g (1 sachet) dried yeast
500ml tap water
Additional 150g Bakers flour or Tipo 00 flour
1 tsp salt
Olive oil, for greasing trays
THERMOMIX METHOD (Dough Preparation)
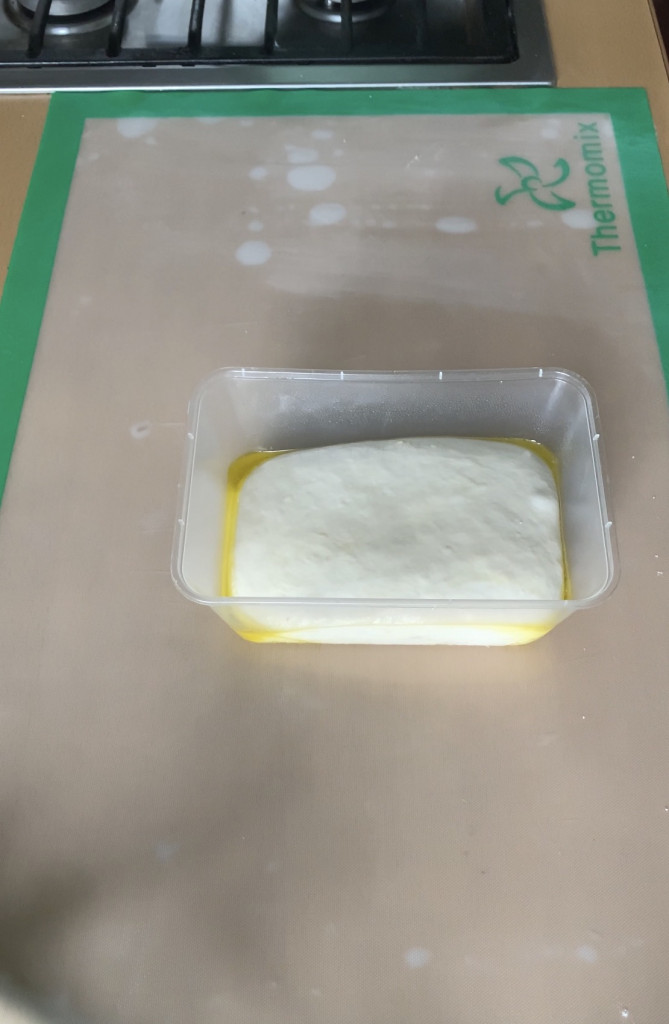
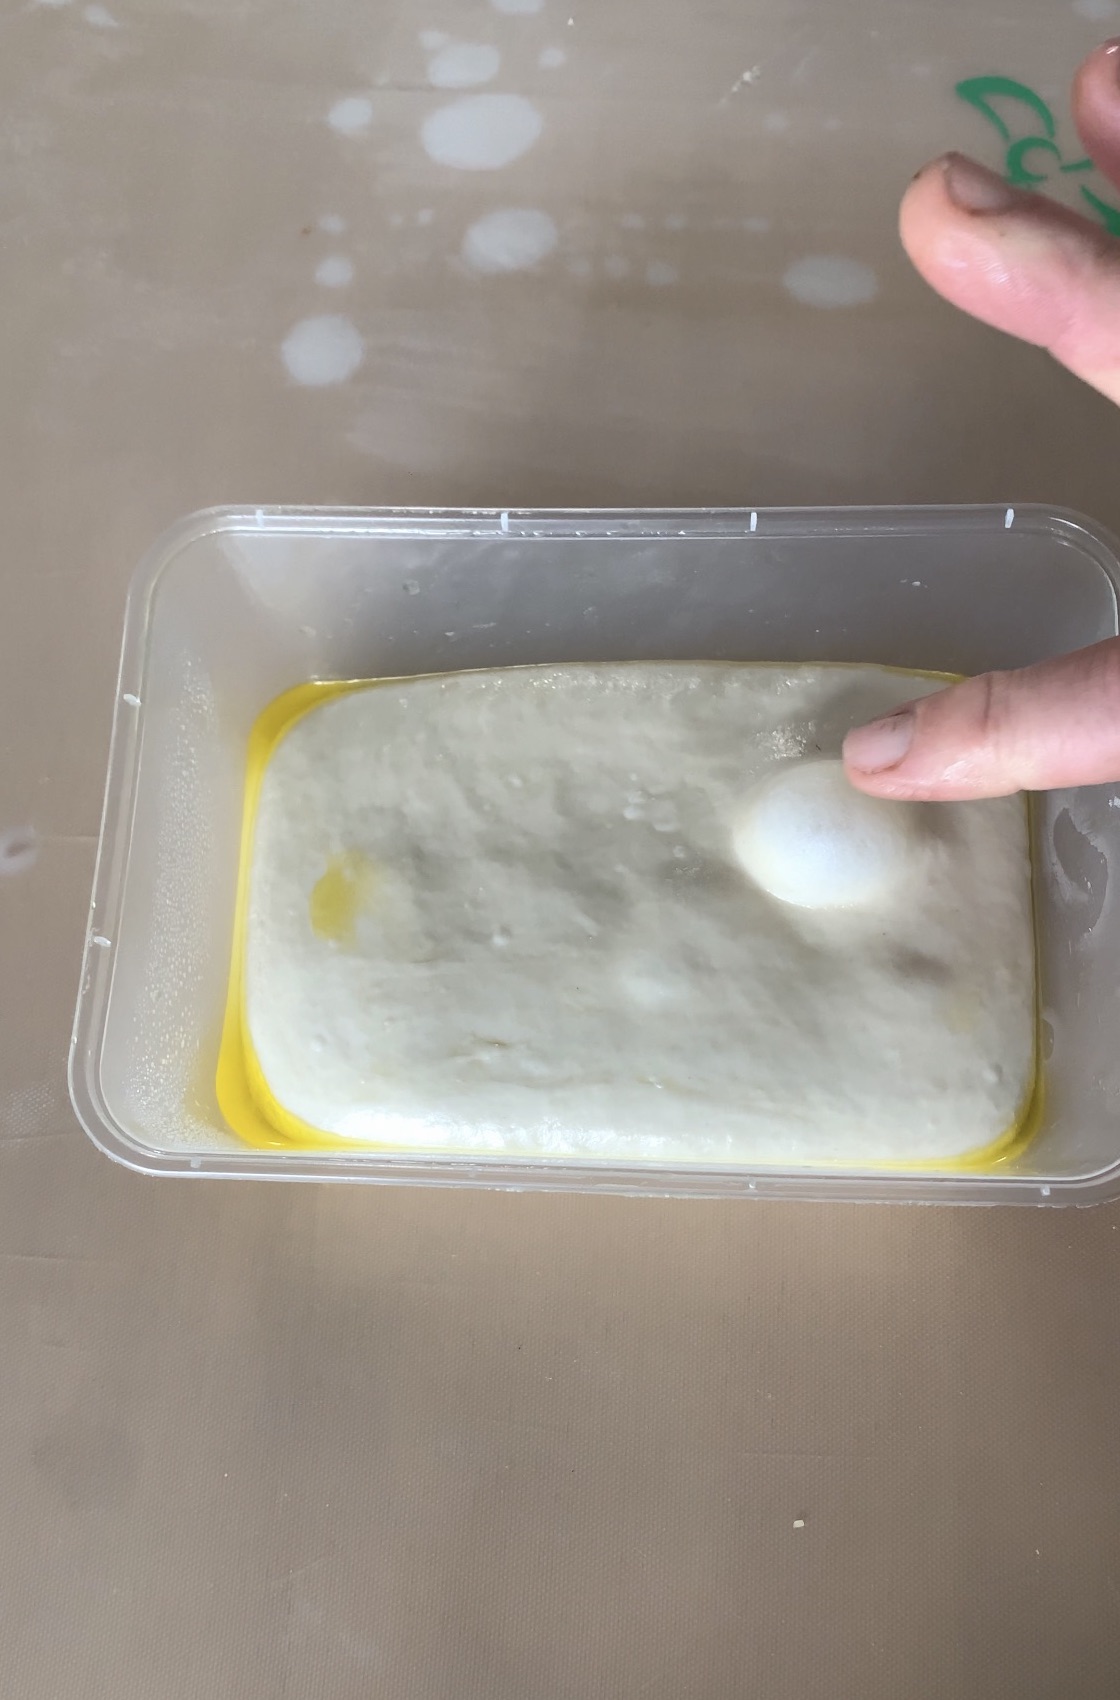
- Place flour, yeast and water into Thermomix and mix for 20 sec | SP5 until ingredients are just combined. Mixture will be wet. Pour into a well oiled bowl and cover with plastic wrap. Refrigerate overnight or for up to 24 hours.
- Remove dough from fridge. Add remaining 150g flour and salt to TM. Add refrigerated flour mixture and KNEAD – 2 min until a smooth ball of dough is formed.
- Continue from “Pizza Dough Ball Preparation” step below.
CONVENTIONAL METHOD (Dough Preparation)
- Place yeast and water into a large mixing bowl. Stir to combine.
- Add 300g of flour and combine by hand for about 30 seconds until flour is moistened.
- Add remaining 300g of flour and continue to combine by hand for 30 seconds, or until no dry flour remains.
- Generously oil another large mixing bowl and add dough to it. Cover with plastic wrap and refrigerate overnight or for up to 24 hours.
- Remove dough from fridge. Combine remaining 100g flour and salt together. Mix this into the refrigerated dough. Turn onto a floured work surface and knead for 5 minutes until a smooth ball of dough is formed.
- Continue from “Pizza Dough Ball Preparation” step below.
PIZZA DOUGH BALL PREPARATION
- Lightly oil a flat tray, large enough to space the dough balls apart by about 2.5cm, with olive oil. Alternatively, use individual plastic lidded containers (about 700ml) or pizza proving box which you have also oiled.
- Place dough onto a lightly oiled work surface. Using scales, divide into 5 x 240g equal portions.
- Use lightly oiled palms & fingers, shape each one into tight dough balls. Do this by stretching the top edges of each ball of dough and tucking them tightly under each ball to form a taut surface on the outside of the dough. Pinch the bottom seam together to hold its shape.
- Place formed dough balls, seam-side down, onto prepared tray or into individual oiled containers and brush or rub a little olive oil over the surface of each dough ball. Gently cover with oiled plastic wrap or container lid and return to fridge for up to 3 days*.
* If you wanted to use the dough immediately after the initial formation of dough balls, leave them to sit covered at room temperature for 2 hours before preparing your pizzas. If you wanted to achieve a more flavoursome and better textured crust, this is when you would leave them in the fridge for up to 3 days. (See “Nico’s Tips” below regarding freezing dough for later use).
STRETCHING DOUGH BALLS FOR PIZZA TOPPING (watch my Facebook Live here – https://fb.watch/dLL72JzOGb/
1. If you have refrigerated the dough balls, remove them from the fridge one hour prior to forming your pizzas.
2. The dough balls will have puffed up again making them very soft, and you might start to see air bubbles forming at the top of the dough.
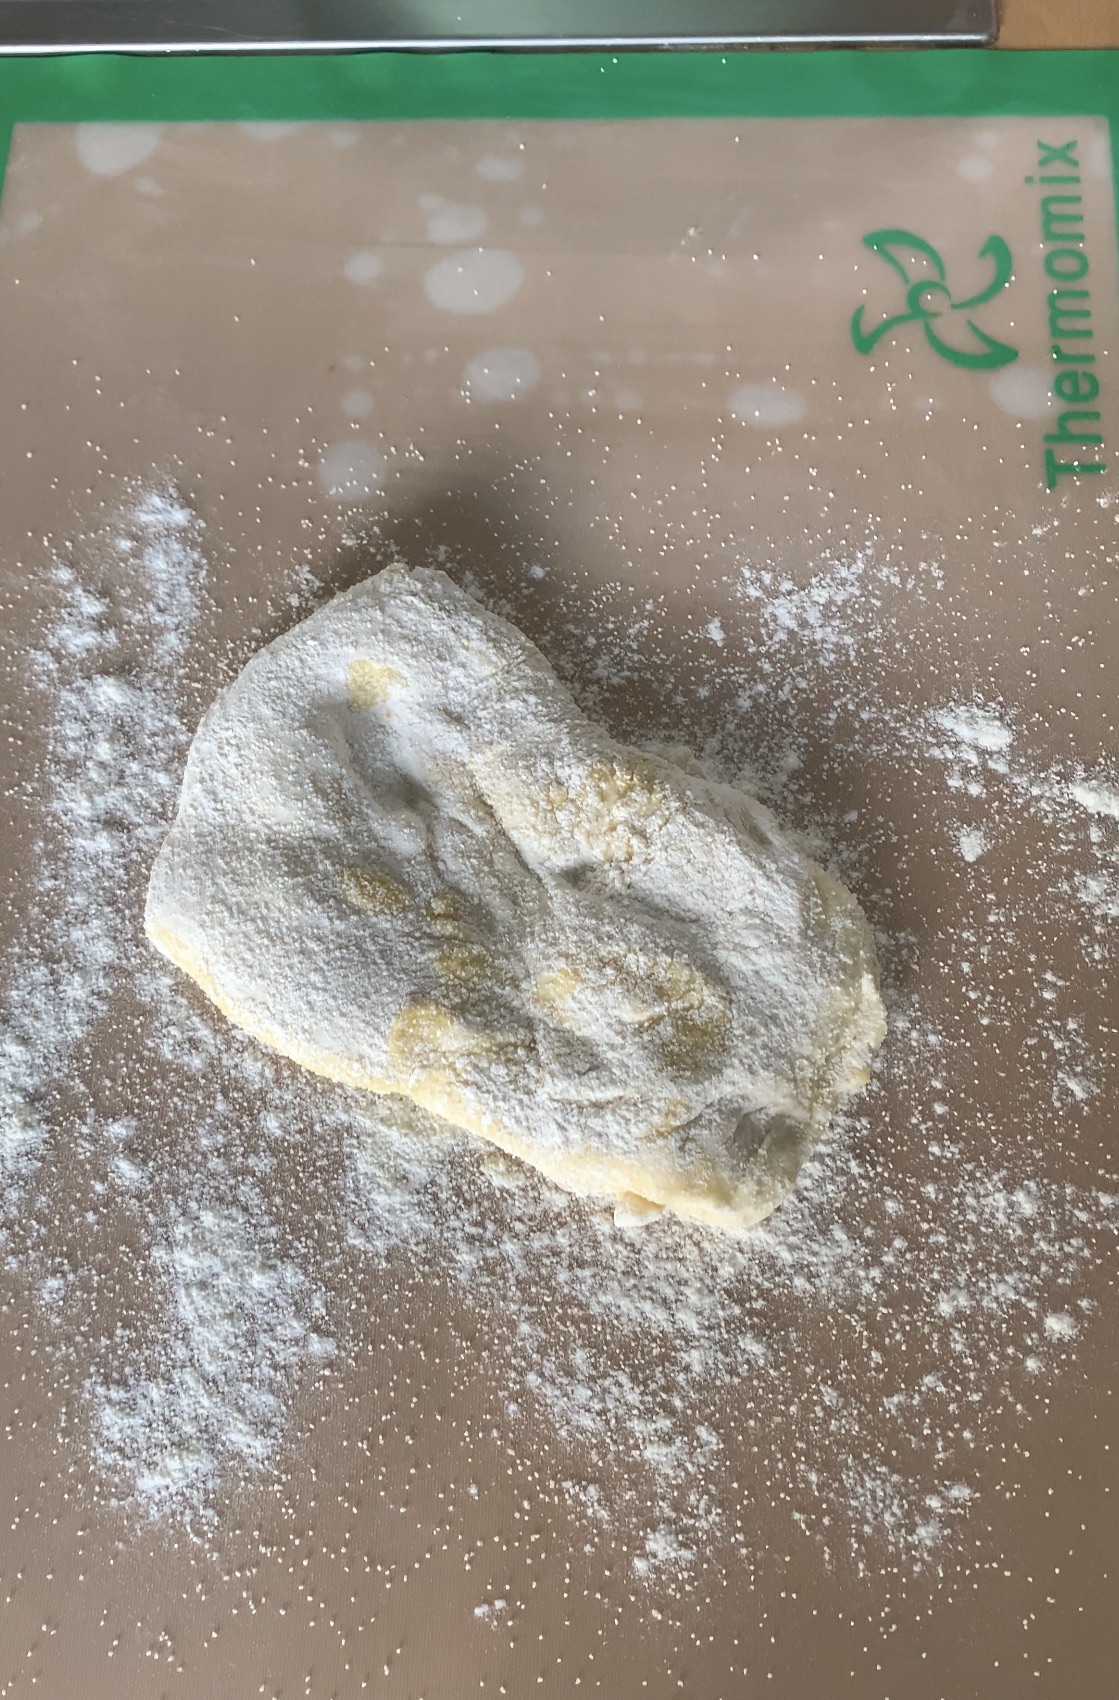
2. In a shallow bowl, mix together 1 cup of flour with 1 cup of coarse semolina. Dust a work surface with some of the flour mixture.
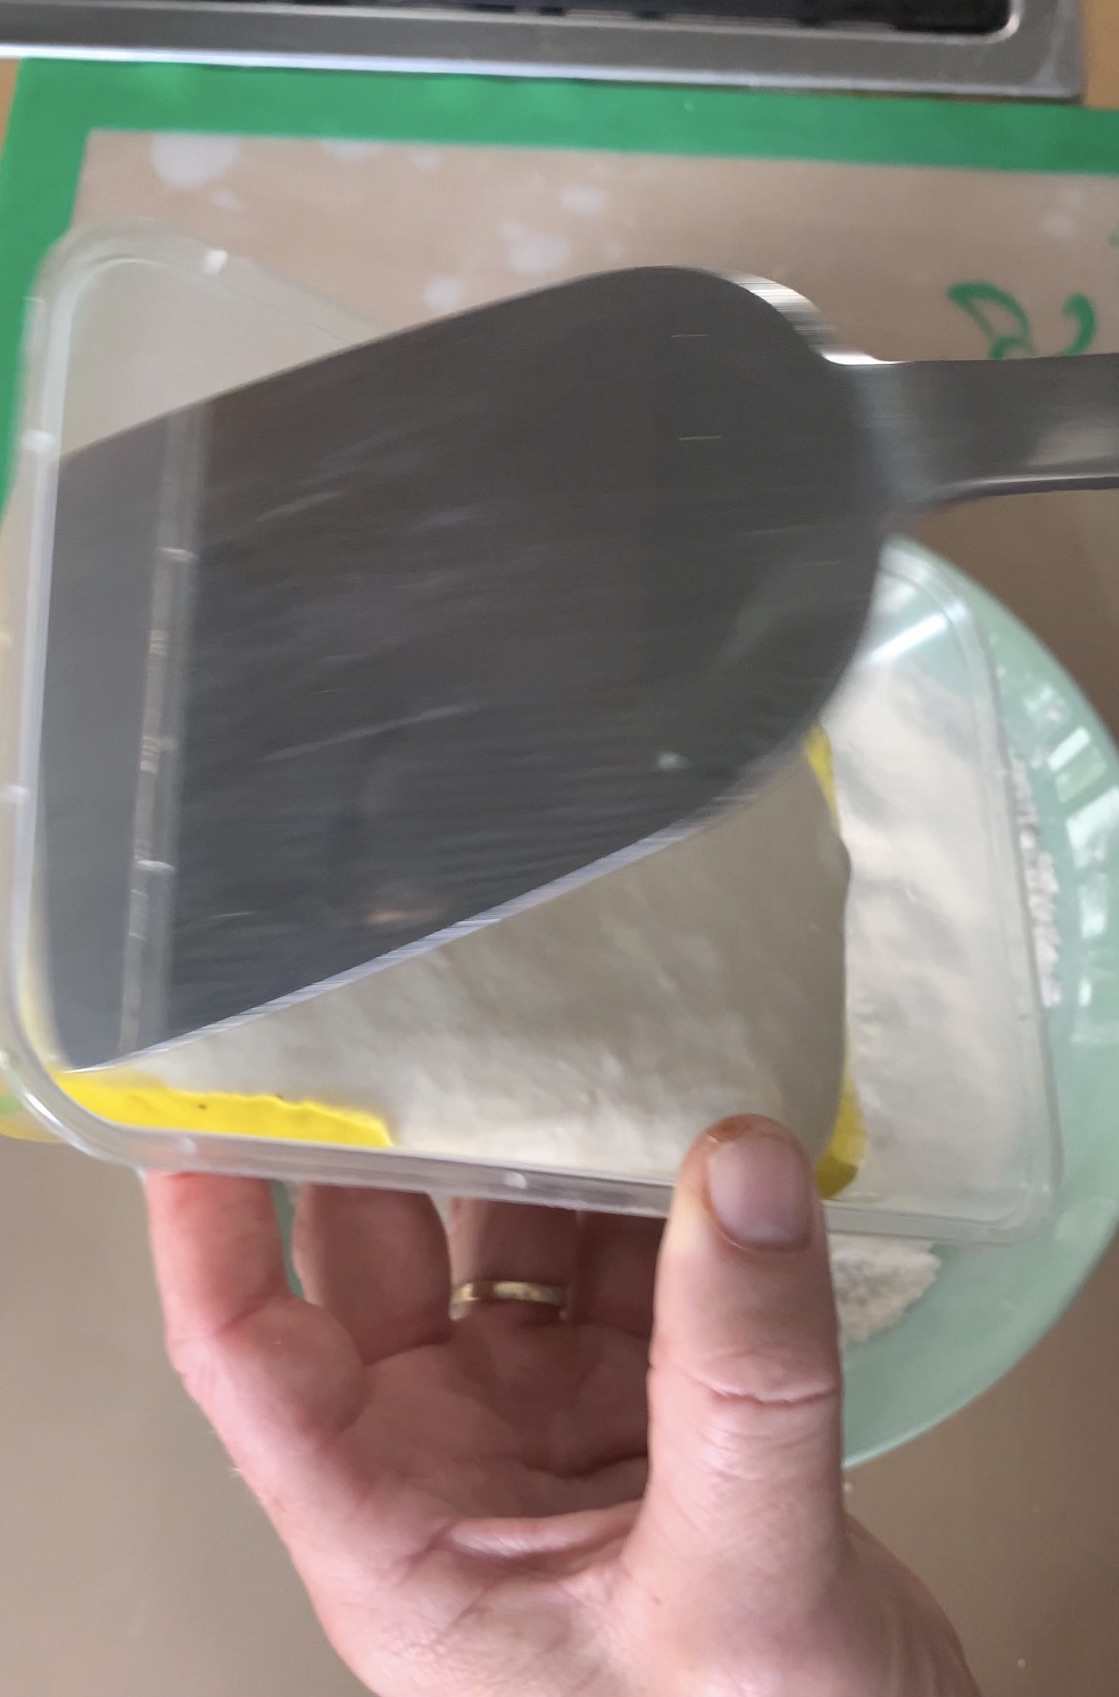
3. Use an oiled or floured bread scraper or metal scraper to gently lift or tip out the dough balls from their container, trying not to lose the air trapped in them, into the bowl of mixed flour. Gently lift and turn over to coat both sides with the flour mixture.
4. Place the floured dough ball onto your floured work surface.
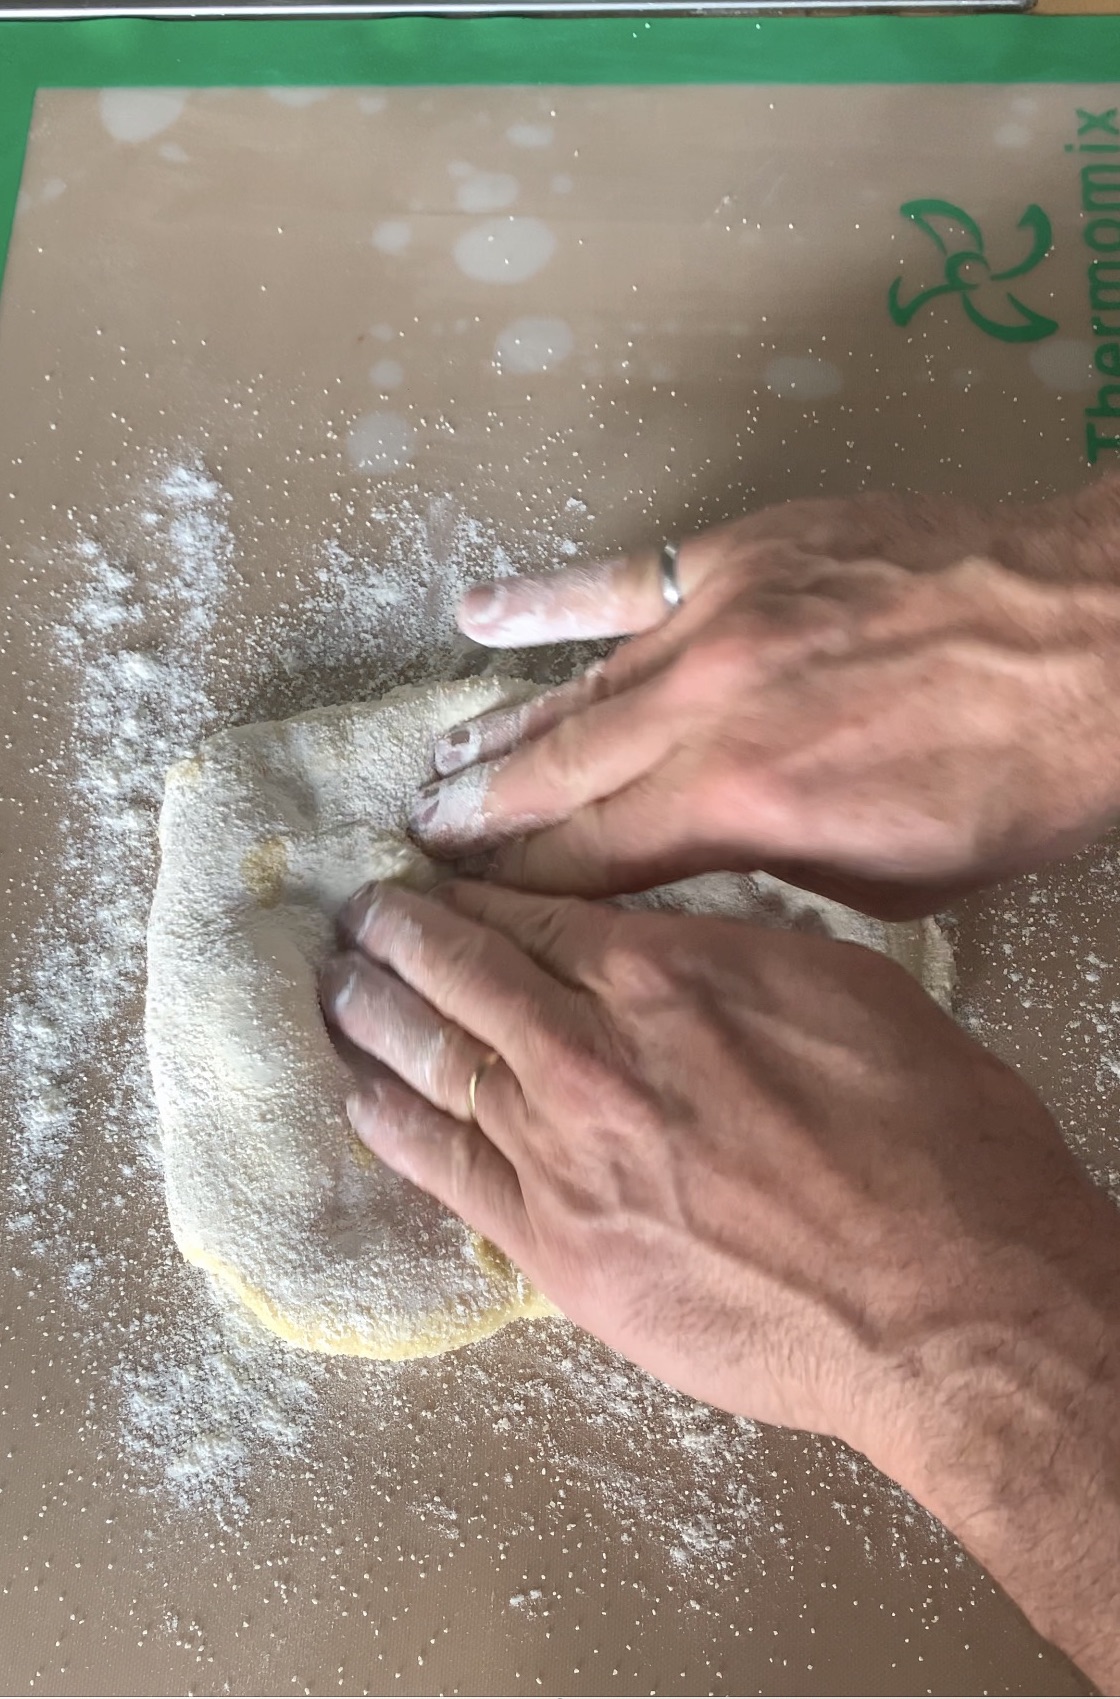
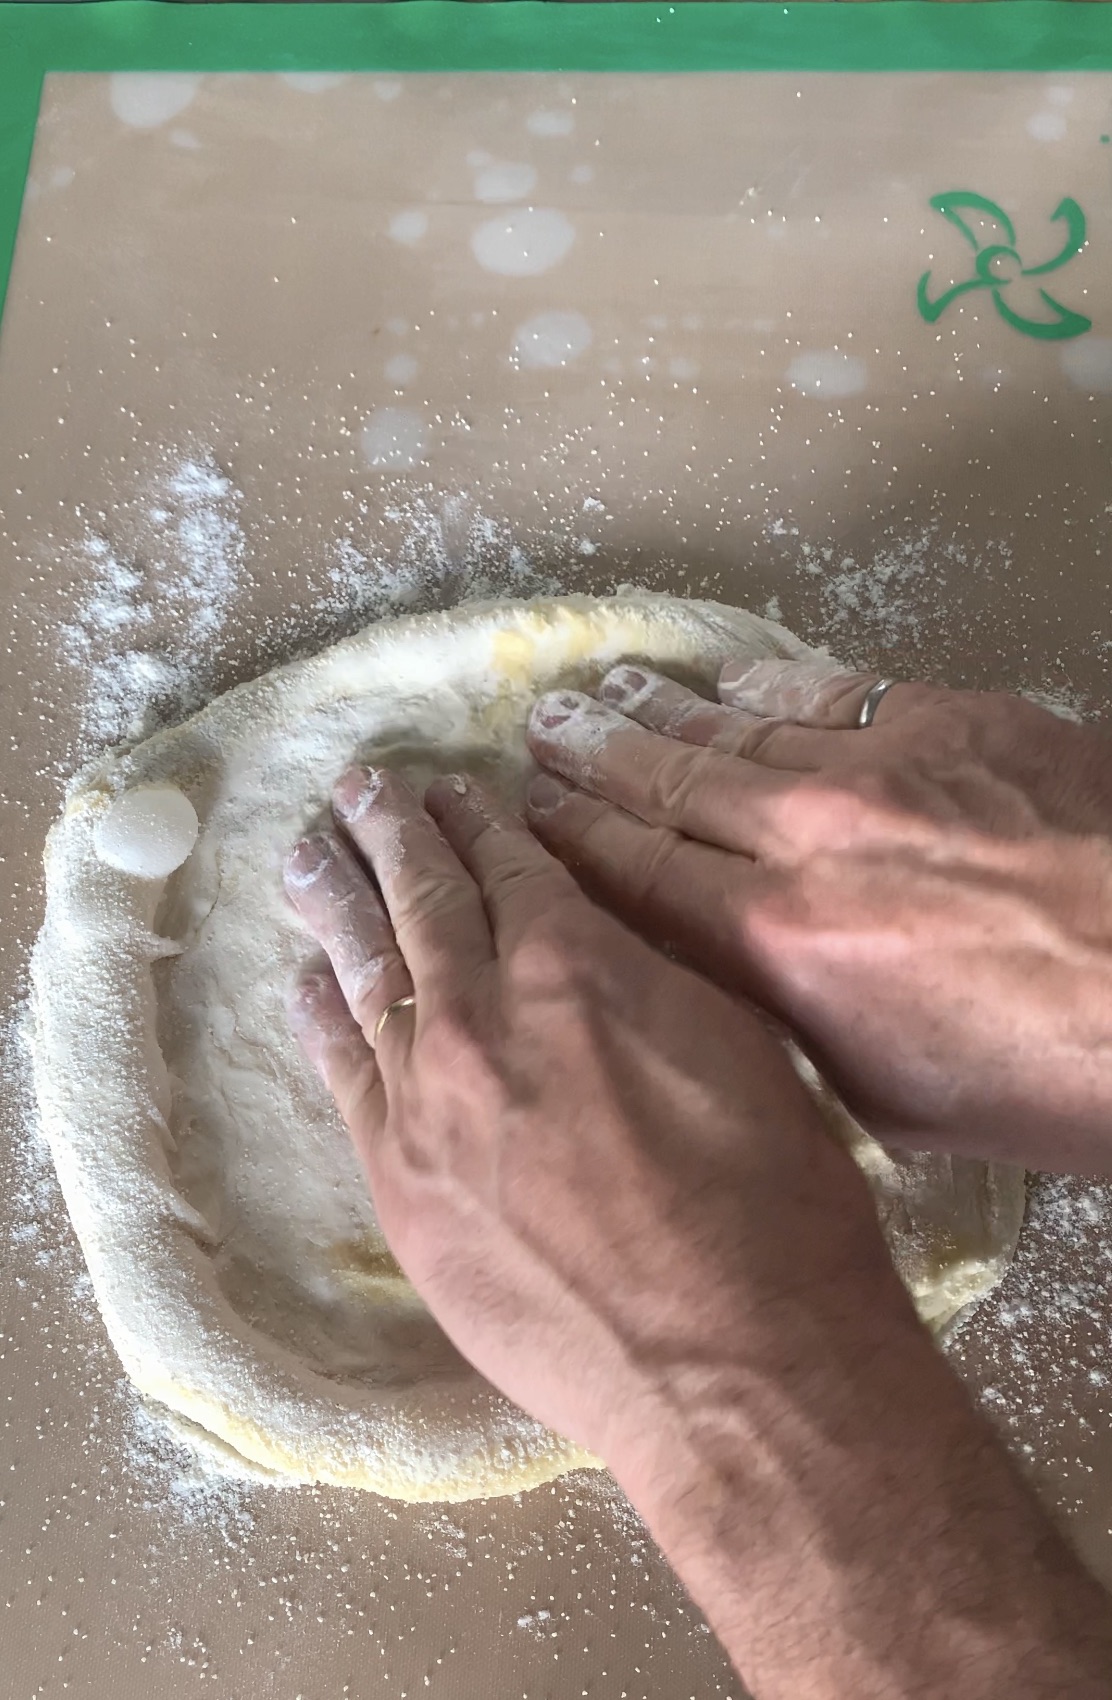
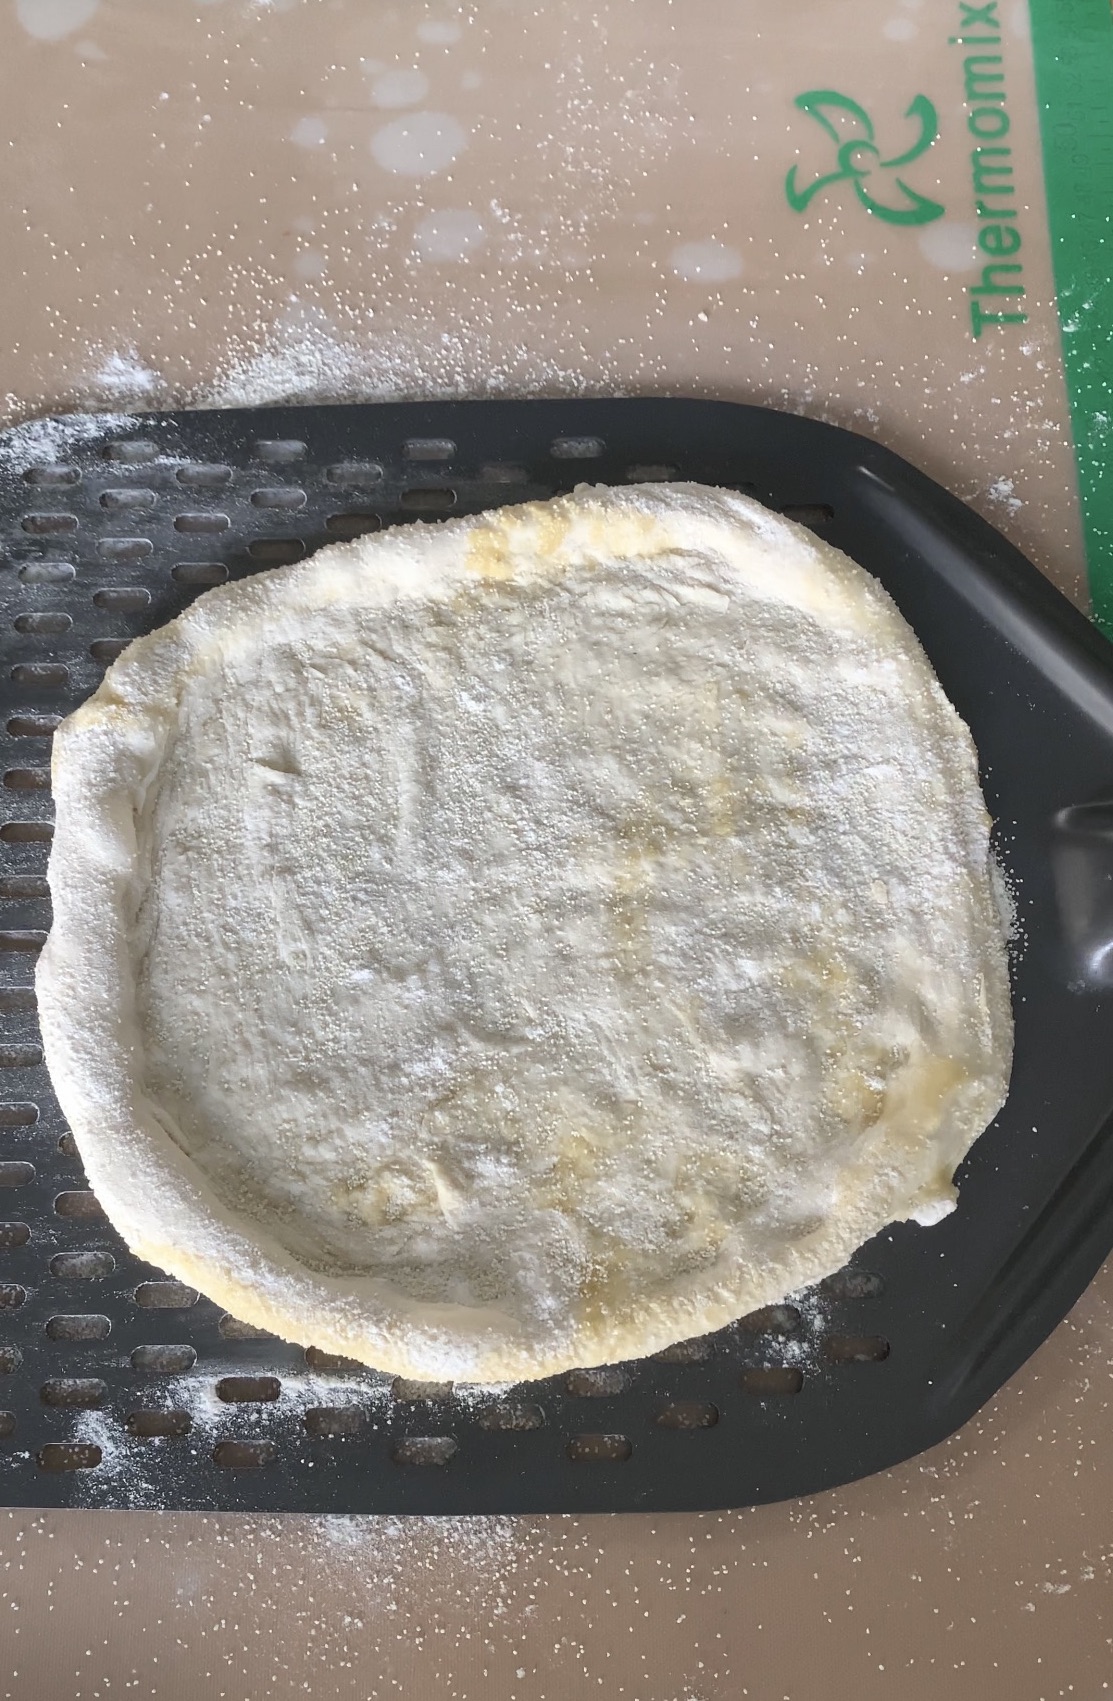
4. Using the tips of your floured fingers, gently press the air from the centre of the dough to the edges to form a 25cm pizza base with about a 2.5cm edge or crust which will be filled with air. Try not to use a rolling pin or you will lose all of the airy bubbles that will give your crust that lovely crispy yet soft chewy texture. Sprinkle the base with additional flour if becoming sticky while pressing out to the 25cm diameter.
5. Dust your pizza paddle with the flour mixture and then gently slide up the formed dough round.
6. While your base is on the pizza paddle, top* your pizza base with your chosen ingredients! Keep gently shaking/shuffling the base on the pizza paddle as you are topping it to make sure that it is not sticking at any places on the paddle.
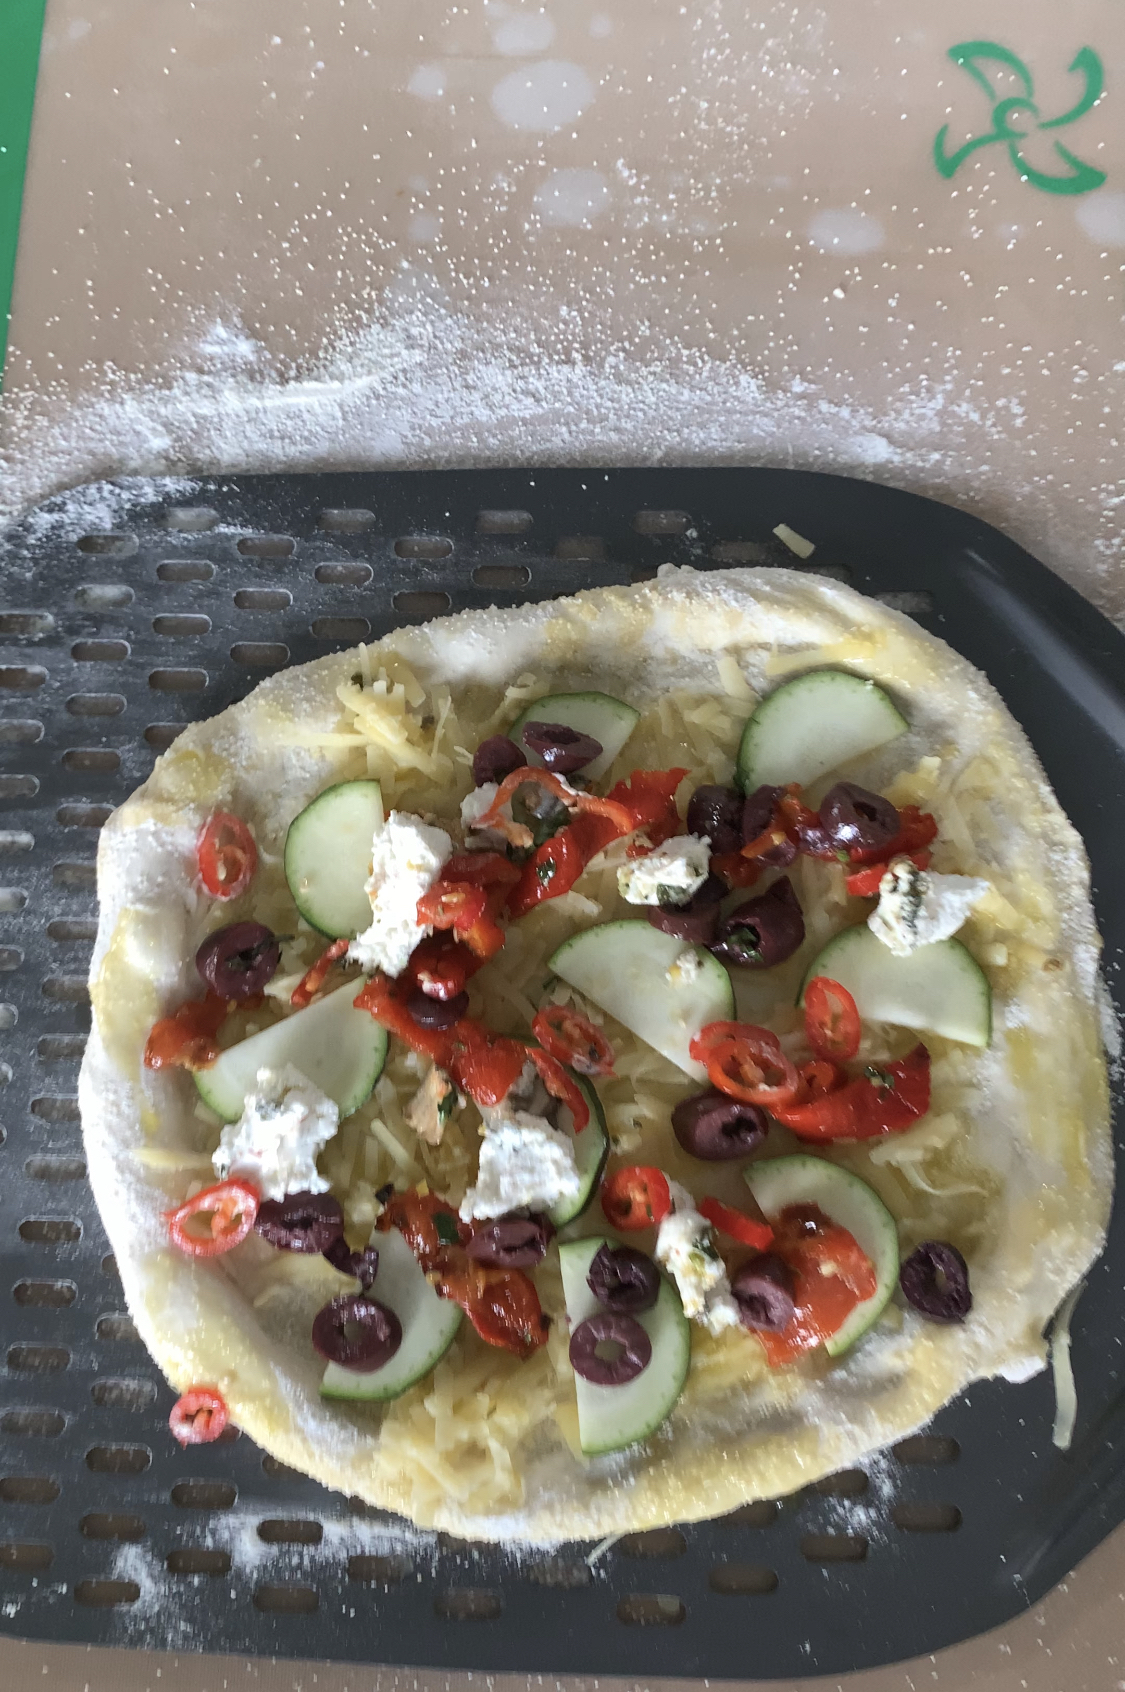
*Nico’s Tip – Remember to do as the Italian’s do and don’t be tempted to overload your pizza bases with too many toppings or flavours. The simpler, the better and there’s less chance of the pizza sticking on the paddle or ingredients being launched across your hot pizza oven when placing it in the oven. For a Basil Oil recipe, please scroll down.
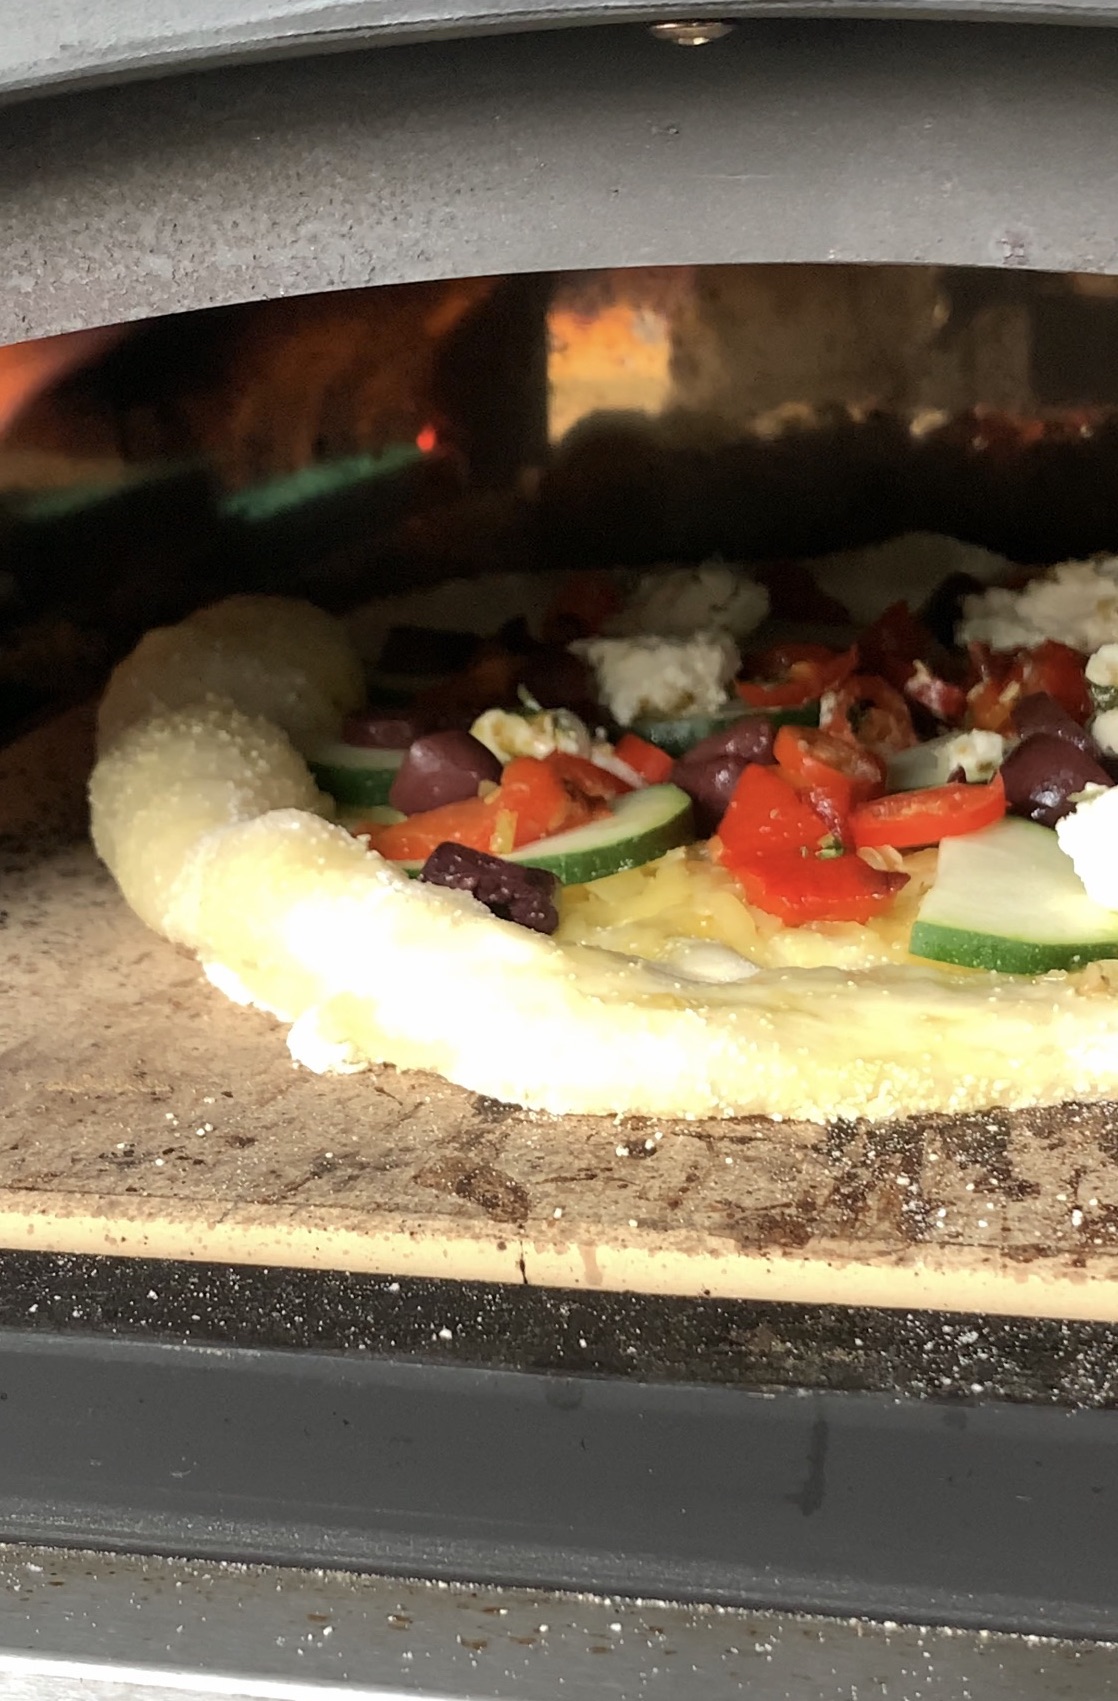
7. Place the pizza and paddle into your portable pizza oven which has been preheated to around 350-400C, and gently shuffle the paddle out from under the pizza to centre in the pizza oven.
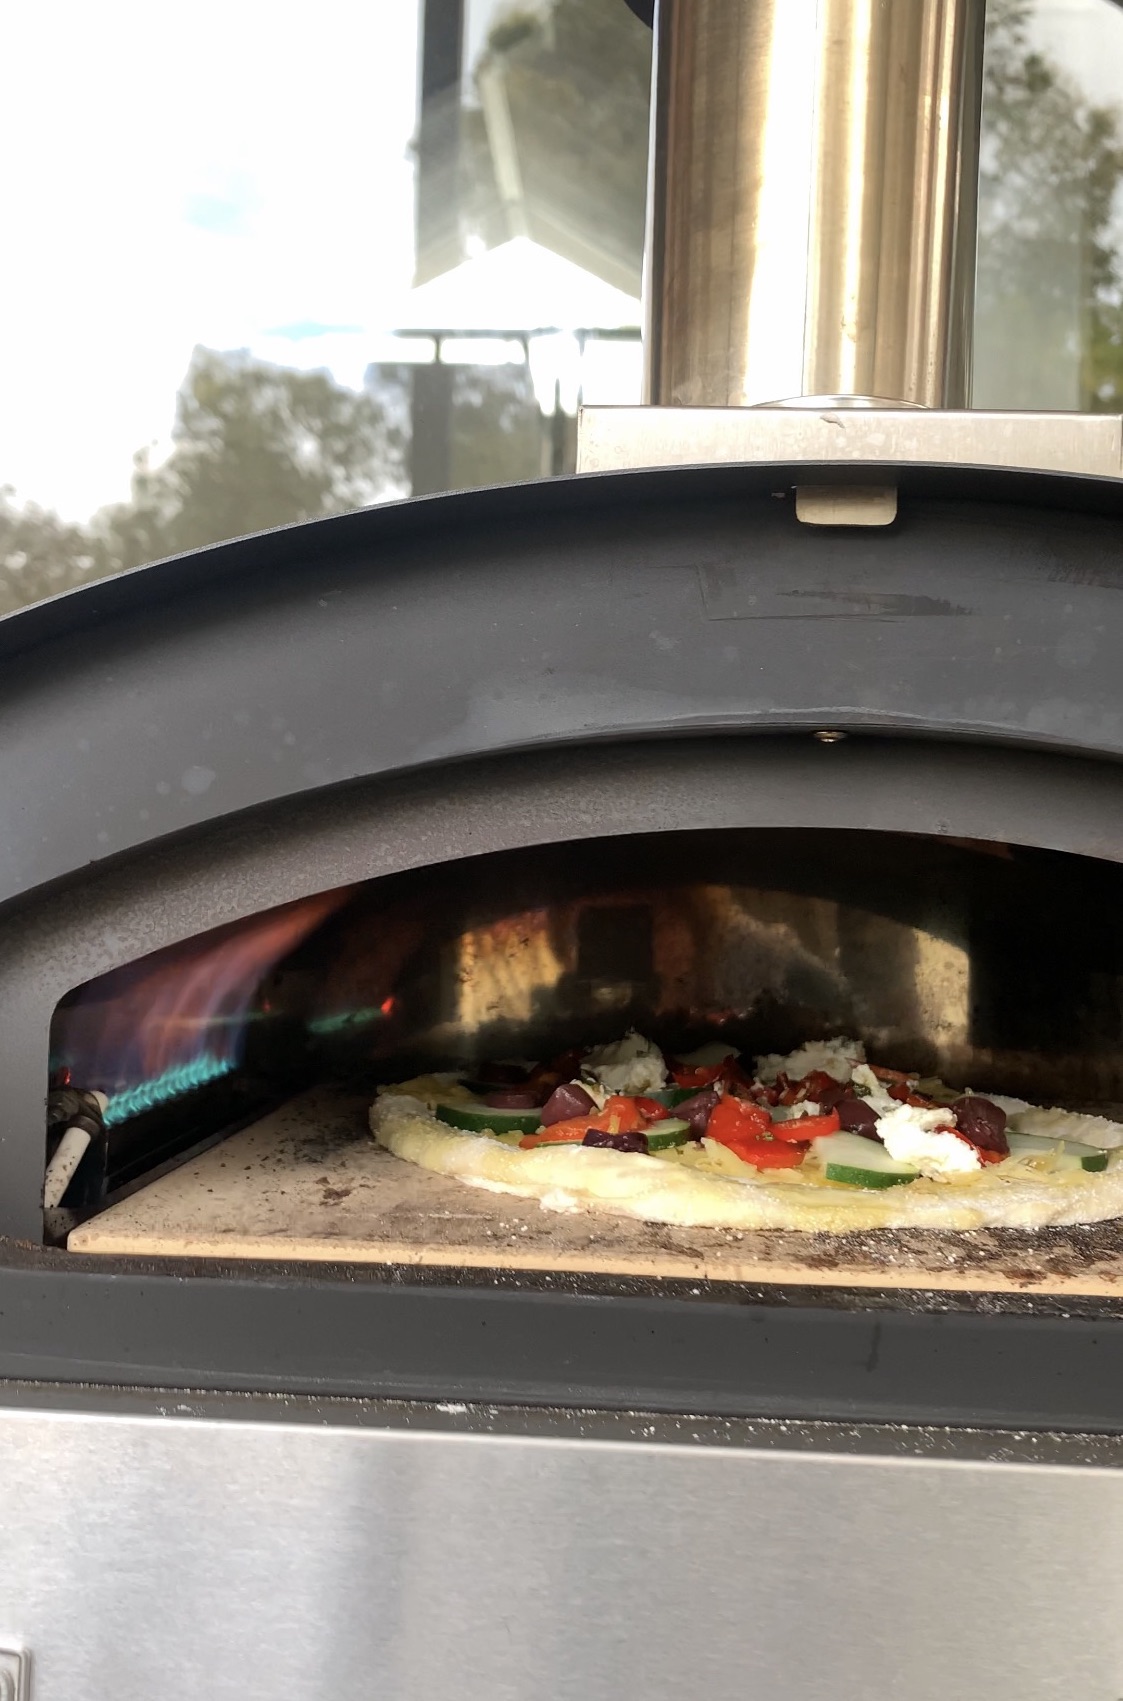
8. Here’s where you need to be attentive! Keep an eye on the pizza as you see the edges starting to puff up. Let it start to take on some colour on the edge before using your pizza turner to gently shuffle it about a quarter of a turn. Repeat this 1/4 turn as often as is necessary to achieve a uniformly “leopard-spotted” char on the crust. If you are getting any large bubbles happening on your crust, don’t hesitate in popping them with a fork by sliding the pizza out on the turner then placing back into the oven.
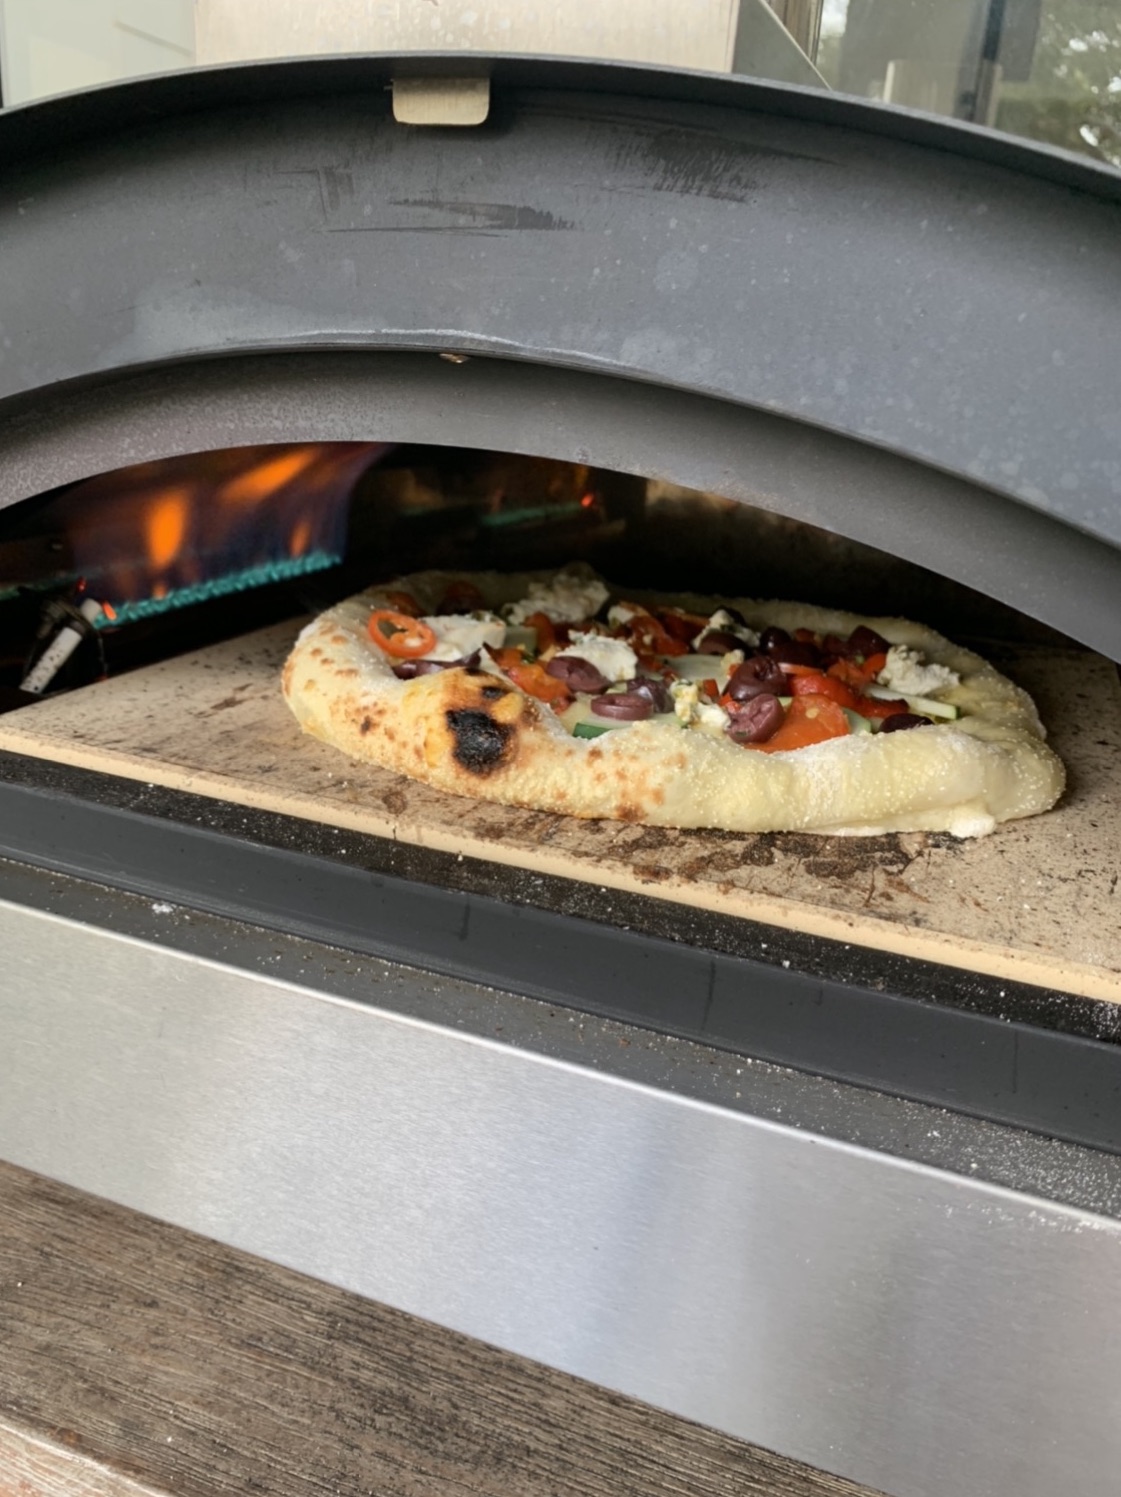
9. Once all of the edges and the bottom of your pizza are nicely browned and cooked, remove to a cooling wire rack to prevent moisture from forming on the bottom of your pizza while resting. Once rested for a minute or so, slice and serve and repeat!!
Buon appetito!!

Nico’s Make Ahead Tips
** If you want to freeze the pizza dough for later use (or if you have left over balls of dough), this is best done if you have placed them into individual oiled containers. Freeze them after they have had their 2-3 days cold fermenting in the fridge, then simply place the containers into the freezer for up to 1 month. To use, let them defrost in the fridge overnight, then follow the recipe above after leaving them to come to room temperature on the bench for 1 hour.
Basil Oil
(Makes about 1/2 cup)
An alternative to using fresh basil leaves to dress your completed pizzas, such as the classic “Margherita”, prepare some Basil Oil which you can spoon or drizzle over your just cooked pizzas.
1/2 cup packed basil leaves (about 30g leaves only)
80g (1/3 cup) Extra Virgin Olive oil
1/2 tsp sea salt
- Bring a pot of water to the boil. Place basil leaves into a strainer and drop into boiled water for 10 seconds.
- Remove strainer & basil and plunge immediately into a bowl of ice water.
- Drain blanched basil leaves and press with your hands to remove excess water. Spread leaves onto a clean tea towel, roll up and press to dry further.
- Place basil, salt and oil into a food processor and blend until smooth (TM – 1 min | SP10). Scrape down sides and repeat until smooth.
- Check for seasoning and place into a small squeeze bottle or sealed container. Drizzle over pizza as required.
- Keep in fridge for up to 2 days, but bring to room temperature before using, Any unused amounts can be frozen.