Pastéis de Nata (Portuguese Tarts) – Thermomix Method
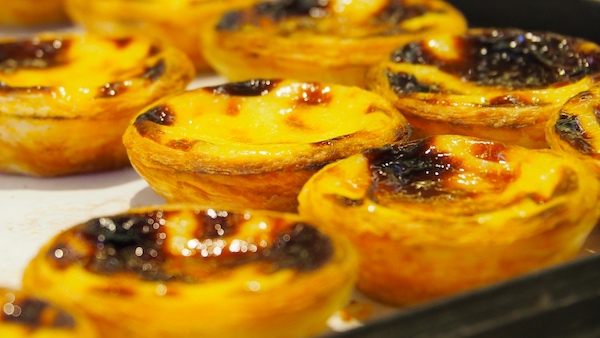
After last month’s Cinnamon Bun obsession, my newest obsession has been “Pasteis de Nata” or those incredibly moreish “Portuguese Custard Tarts”.
As we would have been touring Portugal with our group this month, I needed that taste of Lisbon that you can only get with a true, handmade Portuguese Tart with the luscious soft custard and the crispiness of its buttery pastry!
There is a little work involved in preparing the classic base for these incredibly tasty, and moreish, Portuguese Custard Tarts (Pastéis de Nata), but you will be incredibly rewarded for the “crunch” that you get when you bite into one of these, that you just don’t get if you were to use commercial puff pastry (…sorry!!).
The pastry only takes only 10 seconds to bring together in the Thermomix, but it is a labour of love (but quite easy once you’ve seen it) to create the wonderful buttery lamination that you need for the bases. The recipe also prepares the custard in the Thermomix, because who really wants to be standing over the stove to stir & whisk for 20 minutes when you can just add all of the ingredients into the Thermomix and walk away.

If you are looking for a taste of Lisbon while your at home, then please give these a try!
We trust you enjoy the recipe! We always love to hear your feedback and comments so please following us @nicomorettiaus or @urbanprovider and post up your photos of your Portuguese creations !
(Makes 24 x 70ml muffin cup tarts)
Pastry Ingredients
280g plain flour
1/4 tsp salt
210 ml cold water
250g unsalted butter, room temperature & super soft so you can easily spread it.
Custard Ingredients (Thermomix)
500 g milk
180 g sugar
50g corn flour
5 egg yolks
1 lemon (peel, only the yellow part)
1 tsp vanilla bean paste
1 cinnamon stick, halved
Cinnamon powder, to serve
Pastry Preparation
- Place flour, salt & water into TM bowl and KNEAD for 10sec. It will be a sticky dough. (Conventional Method – Place into a mixer with a dough hook and combine for about 30sec or until dough comes together.)
- Place onto a well floured surface, sprinkle with more flour over the top, then form into a 20cm square. Cover with plastic wrap and let rest for 15 minutes.
- Generously flour both sides of rested dough and carefully roll out into a 45-50cm square. Lift edges up using a bread scraper to dust with flour under dough, as you roll, to prevent it from sticking to work surface.
- Ensure that each of 3 x 85g portions of butter is super soft and easily spreadable. Spread butter over two thirds of right hand side of the rolled dough, leaving a 2.5cm edge free from butter.
- Fold unbuttered left-side third of dough over middle third of buttered dough. Then fold right-side third of buttered dough over to create a rectangle. Even up edges.
- Gently seal down edge furthest away from you, then use your fingers to press out any air bubbles as you work down dough towards you. Gently seal edge closest to.
- Turn rectangle dough to the left so that a long edge is facing you. Once again dust work surface and dough generously with flour.
- Roll again into a 45-50cm square as previously. Repeat spreading of one third of butter across two-thirds of dough and overlapping folds, as well as the gentle sealing and removal of air bubbles done in Steps 5 & 6.
- Turn rectangle dough to the left so that a long edge is facing you. Once again dust work surface and dough generously with flour. Roll out one last time to a 45-50cm square. This time, spread last third if butter over entire square, leaving a 2.5cm edge furthest away from you.
- Starting from the edge closest to you, roll the dough away from you into a tight even log, using your scraper or spatula to loosen dough if it is stuck as you roll. Just before you finish rolling, brush a little water over the exposed 2.5cm end and seal roll closed
- Cut the rolled pastry into 2 even halves about 24cm long. Roll in plastic wrap and refrigerate for 2 hours (or overnight) or freeze for another time.
Custard Preparation
- Prepare custard by placing the milk, sugar, corn flour and egg yolks into TM bowl. Mix 10 sec / SP4.
- Insert Butterfly then add cinnamon stick, lemon peel, and vanilla bean paste and cook – 18 min / 85C / SP1.5. The cooked mixture will be quite runny, but will set when baked. Strain into a clean jug to make it easier to pour into prepared pastry. Cover with plastic wrap to let cool a little, while preparing pastry. (TIP: Custard mixture will keep for up to 3 days in a sealed container in the fridge).
Tart Assembly
- Preheat your oven to the hottest that is possible, preferably 280-290C (Conventional, not Fan Forced), and set oven rack to the top third. Have a non-stick 12 x 70ml (1/3 cup) muffin tray ready. If it’s not non-stick, gently grease with a small rub of butter.
- Remove one chilled pastry log from refrigerator and gently roll on a lightly floured surface to reform into a 2.5cm diameter x 24cm log. Cut into 12 even pieces about 2cm wide each. Place pieces, cut side down, into muffin tray then allow to soften for a few minutes before pressing into shape.
- Place some water into a small bowl. Dip your thumb into the water then press down onto the middle of the cut dough. Flatten the dough into the bottom of the muffin cup, then with wet fingers, stretch dough up the sides. Pastry should be about 3mm thick. (TIP: You can chill prepared muffin trays until ready to cook tarts, or even freeze for another time).
- Fill prepared pastry shells 3/4 full with cooled custard. Place into preheated oven and cook for 10-12 minutes or until pastry has browned on the edges and custard starts to blister & caramelise. Keep an eye on them if they are cooking too quickly.
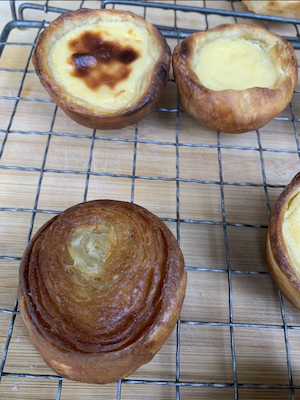
- Remove from oven and allow to cool for a minute before carefully removing them from muffin tray to a cooling rack to cool until they are slightly warm (the best time to eat them!). Dust with cinnamon powder and enjoy!!
Obrigado!